Introduction
Cloudflare Pages is currently in Beta.
This tutorial will show you how to create a static site on Cloudflare Pages using the Hugo static site generator from a Windows PC.
Prerequisites
- Open an account on GitHub https://github.com and verify your email address
- Open an account on Cloudflare https://www.cloudflare.com, verify your email address, and request access to the Cloudflare Pages Beta
Step 1 — Installing Git
Open a browser on your PC and visit https://git-scm.com/download/win.
Download the latest 64-bit installer for Git on Windows. It will have a name that looks like Git-x.x.x-64-bit.exe.
Run the installer.
- If asked if you want to allow this app to make changes to your device, click Yes.
- Accept the license.
- Accept the default destination location of
C:\Program Files\Git. - Accept the default components.
- Accept the default Start Menu folder.
- Accept the default editor of
vim. - Accept the default name of initial branch.
- Accept the default PATH environment.
- Accept the default OpenSSL library.
- Accept the default line endings.
- Accept the default terminal emulator.
- Accept the default behavior of
git pull. - Accept the default credential helper.
- Accept the default extra options.
- Accept the default experimental features, and click Install.
Wait while the Setup installs Git on your computer.
Click Finish when the installation is complete.
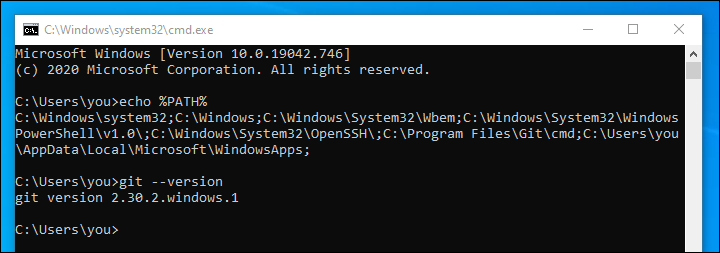
At the end of the install, C:\Program Files\Git\cmd has been added to your PATH. You can check the install by opening a Command Prompt (Win+R and enter cmd) and issuing the commands:
echo %PATH%

git --version
Set up your initial Git global variables. Substitute your actual name and email address into the following commands:
git config --global user.name "John Doe"
git config --global user.email johndoe@example.com
git config --global push.default simple
Step 2 — Installing Hugo
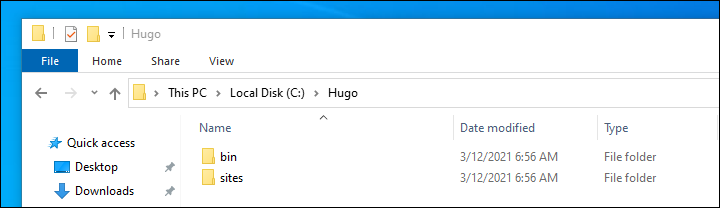
Create new directories C:\Hugo\bin and C:\Hugo\sites.
Open a browser on your PC and visit https://github.com/gohugoio/hugo/releases
Download the latest binary hugo_extended_x.x.x_Windows-64bit.zip.
Unzip the downloaded zip file.
Copy the hugo.exe application into C:\Hugo\bin.
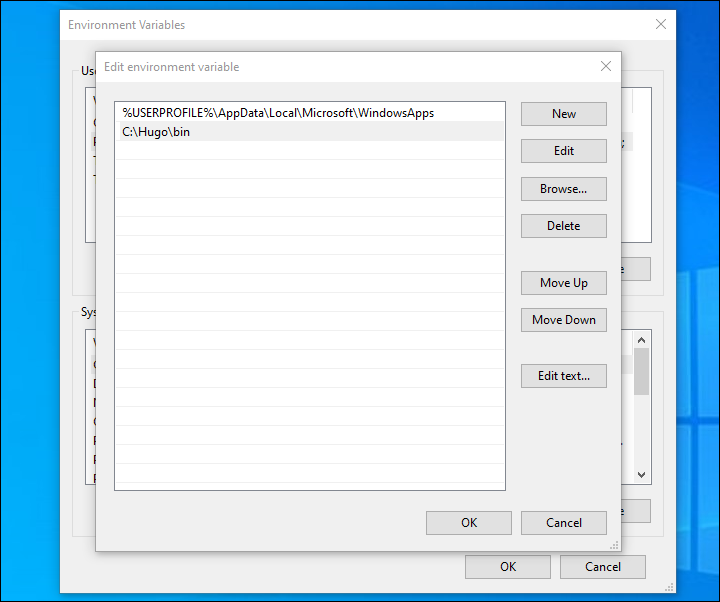
Add C:\Hugo\bin to your PATH:
- Right-click on the Windows icon bottom left of your screen, and select System.
- Scroll down and click Advanced system settings.
- Control Panel opens.
- Click Environment Variables.
- Select Path.
- Click Edit.
- Click New.
- Type
C:\Hugo\bin. - Click OK.
- Click OK.
- Click OK.
Sign out and sign back in again.
C:\Hugo\bin has now been appended to your PATH.
Step 3 — Creating a Hugo Site
Opening a Command Prompt (Win+R and enter cmd). Change into the Hugo sites directory:
cd C:\Hugo\sites
Create a new site named my-hugo-site (or another name, if you prefer):
hugo new site my-hugo-site
Change into the directory for your new site:
cd my-hugo-site
Initialize this directory as a Git repository by issuing the command:
git init
Step 4 — Adding a Hugo Theme
Hugo sites start without a theme. You must add one before you can do anything with the site. We will use the example of the Terminal theme. Issue the command:
git submodule add https://github.com/panr/hugo-theme-terminal.git themes/terminal
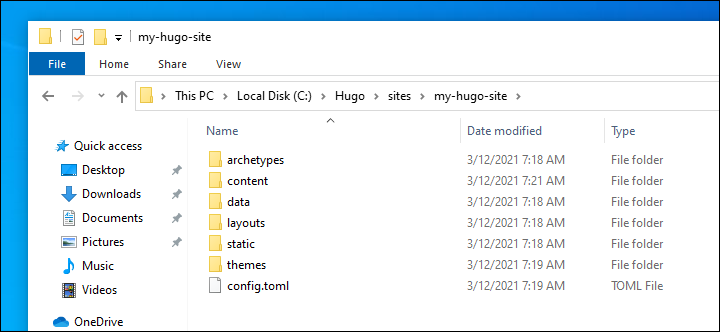
The theme comes with an example site in its own folder. In Windows File Explorer, navigate to C:\Hugo\sites\my-hugo-site\themes\terminal\exampleSite.
There are three items: a folder content, a folder static, and a file config.toml.
Copy all three up into the root of the site, C:\Hugo\sites\my-hugo-site.
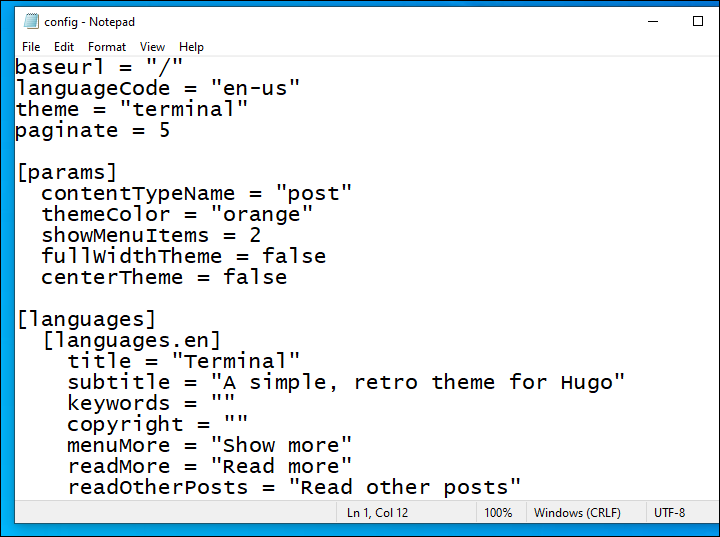
Edit the file config.toml in Notepad. Correct the base URL to simply /. Correct the theme directory name to simply terminal. Save the file and close Notepad.
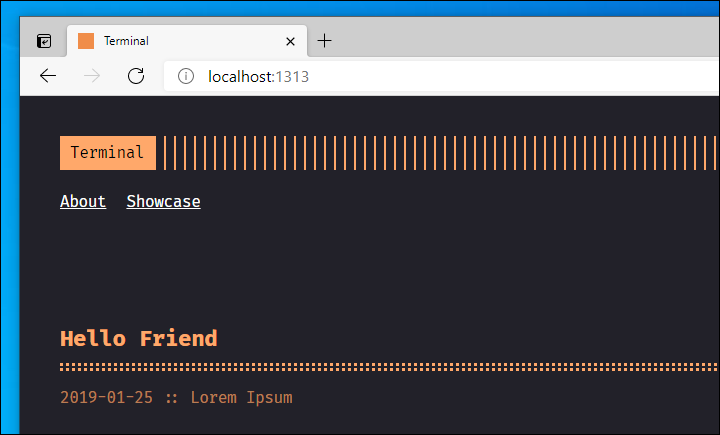
You can check your work so far with the command:
hugo serve
Open a browser and visit localhost:1313.
When you are done, close your browser, and press CTRL+C to stop Hugo running in your Command Prompt window.
Step 5 — Creating a Hugo Post
Create a new post. This example is named 2021-03-12-cloudflare-pages-site-windows, but you should choose a name of your own.
cd C:\Hugo\sites\my-hugo-site

hugo new post/2021-03-12-cloudflare-pages-site-windows.md
Edit the file in Notepad.
Completely remove the line draft: true.
Add whatever other content you want.

Save the file, and close Notepad.
Delete the file hello.md that came with the theme.
You can check your work so far by again issuing the command:
hugo serve
Open a browser and visit localhost:1313. Click through to the body of your post.
When you are done, close your browser, and press CTRL+C in the Command Prompt windows to stop the Hugo server.
Step 6 — Creating a GitHub Repository
Log in to your GitHub account.
Create a new GitHub repository.
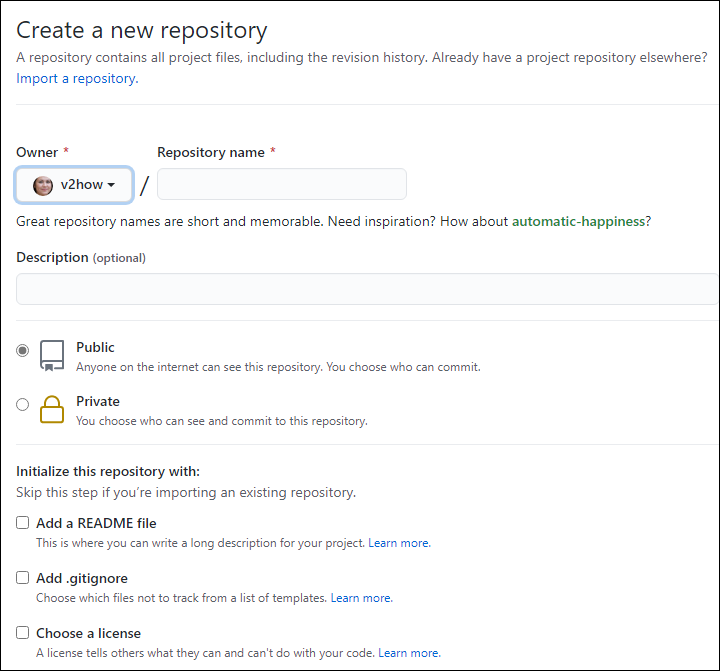
- Give it a name, e.g.
my-hugo-site. - Description is optional.
- It may be public or private, as you prefer.
- Leave it empty – no README, no gitgnore, no license.
- Click Create repository.
Step 7 — Pushing Your Site to GitHub
Once you’ve created a new repository on GitHub, push your local repository to GitHub. In a Command Prompt window, issue the commands:
cd C:\Hugo\sites\my-hugo-site
In the next command, replace yourgithubusername by your actual user name on GitHub:
git remote add origin https://github.com/yourgithubusername/my-hugo-site

git branch -M main

git add .

git commit -m "Initial commit"

git push -u origin main
Step 8 — Deploying with Cloudflare Pages
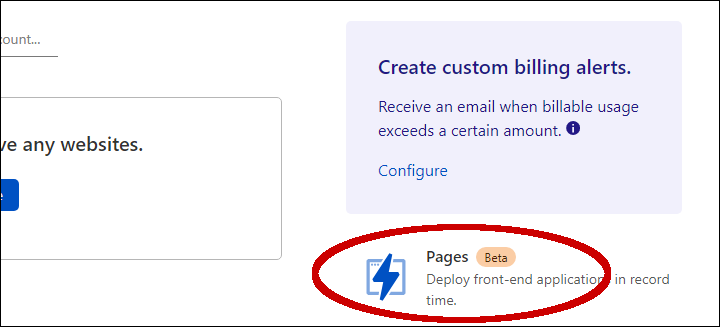
Log in to your Cloudflare account.
If you have been granted access to Cloudflare Pages Beta, you will see a link for Pages (Beta). Click that link.
- Click Create a project.
- Click Connect GitHub account.
- Click Install and Authorize.
- Select your new GitHub repository that you created above, e.g.
my-hugo-site, and click Begin setup. - Set Production branch to
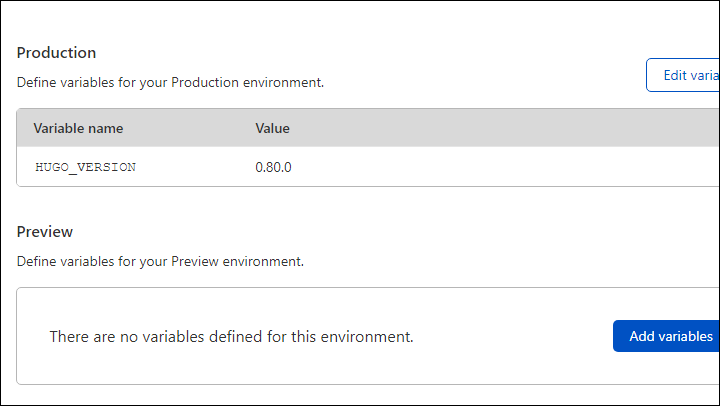
main, Build command tohugo, and Build output directory topublic. - In the Environment variables, add
HUGO_VERSIONand set it to0.80.0. - Click Save and Deploy.
You will see the progress of the stages of the build: Initializing build environment; cloning Git repository; Building application; and Deploying to Cloudflare’s global network.
Once you’ve deployed your site, you’ll receive a unique subdomain for your project in the pages.dev domain. For example, https://my-hugo-site.pages.dev.
Conclusion
Every time you commit new code, Cloudflare Pages will automatically rebuild your project and deploy it.